| ❌ | ❌ | ✅ | ✅ | ✅ | ✅ |
|---|
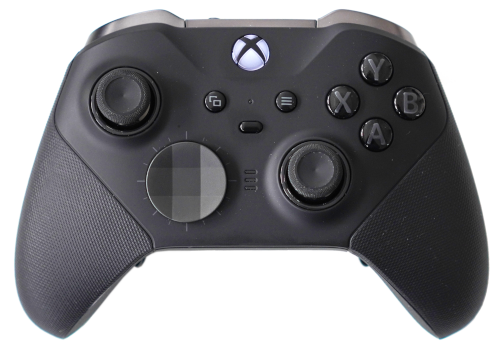
Xbox Controller
- class XboxController(joystick_deadzone=10, name=None, timeout=10000, connect=True)
Use the Microsoft® Xbox® controller as a sensor in your projects to control them remotely.
The hub will scan for the controller and connect to it. It will disconnect when the program ends.
For tips on connectivity and pairing, see below.
- Parameters:
joystick_deadzone (Number, %) – Joystick deadzone (0 to 100). Values below this threshold in both axes will be reported as 0 to prevent stick drift.
name (str) – The Bluetooth name of the Xbox controller to connect to, or
Noneto connect to any available controller.timeout (Number, ms) – How long to wait for a connection before giving up. Choose
Noneto wait indefinitely.connect (bool) – Choose
Falseto skip connecting to the controller.connect()can be called later to connect.
- awaitconnect()
Connects to the Xbox controller. Only needed if you disconnected or initialized the controller with
connect=False.
- name() str
Gets the Bluetooth name of the connected controller.
- Returns:
Bluetooth name of the controller.
- Raises:
OSError – If the controller is not connected.
- buttons.pressed() Set[Button]
Checks which buttons are currently pressed.
- Returns:
Set of pressed buttons.
Buttons include:
Button.A,Button.B,Button.X,Button.Y.Button.UP,Button.DOWN,Button.LEFT,Button.RIGHT(direction pad). At most two of these can be pressed at the same time.Button.LBandButton.RB(bumpers).Button.LJandButton.RJ(pressing the joysticks).Button.VIEW,Button.MENU,Button.GUIDE(the Xbox logo), andButton.UPLOAD.Button.P1,Button.P2,Button.P3, andButton.P4(Elite Series 2 only). Pressing the paddles may also be detected as other button presses, depending on the currently active profile.
- joystick_left() Tuple
Gets the left joystick position as percentages between -100% and 100%. The center position is (0, 0). A square deadzone is applied: if both axes are within the deadzone, both are reported as 0.
- Returns:
Tuple of X (horizontal) and Y (vertical) position.
- Raises:
OSError – If the controller is not connected.
- joystick_right() Tuple
Gets the right joystick position as percentages between -100% and 100%. The center position is (0, 0). A square deadzone is applied: if both axes are within the deadzone, both are reported as 0.
- Returns:
Tuple of X (horizontal) and Y (vertical) position.
- Raises:
OSError – If the controller is not connected.
- triggers() Tuple
Gets the left and right trigger positions as percentages between 0% and 100%.
- Returns:
Tuple of left and right trigger positions.
- Raises:
OSError – If the controller is not connected.
- dpad() int
Gets the direction-pad value.
1is up,2is up-right,3is right,4is down-right,5is down,6is down-left,7is left,8is up-left, and0is not pressed.This is essentially the same as reading the state of the
Button.UP,Button.RIGHT,Button.DOWN, andButton.LEFTbuttons, but this method conveniently returns a number that indicates a direction.- Returns:
Direction-pad position, indicating a direction.
- Raises:
OSError – If the controller is not connected.
- profile() int
Gets the current profile of the controller. Only available on the Xbox Elite Controller Series 2.
- Returns:
Profile number.
- Raises:
OSError – If the controller is not connected.
- awaitrumble(power=100, duration=200, count=1, delay=100)
Makes the builtin actuators rumble, creating force feedback.
If you give a single
powervalue, the left and right main actuators will both rumble with that power while the trigger actuators stay off. For more fine-grained control, setpoweras a tuple of four values, which control the left main actuator, right main actuator, left trigger actuator, and the right trigger actuator, respectively. For example,power=(0, 0, 100, 0)makes the left trigger rumble at full power.The rumble runs in the background while your program continues. To make your program wait, just pause the program for a matching duration. For one rumble, this equals
duration. For multiple rumbles, this equalscount * (duration + delay).This method does nothing if all actuator powers are zero, if
durationis zero, or ifcountis less than 1.- Parameters:
power (Number, % or tuple) – Rumble power. A single value applies to both main actuators (0-100%). A tuple applies individually to (left handle, right handle, left trigger, right trigger).
duration (Number, ms) – Duration of each rumble. Capped at 2500 ms.
count (int) – Number of rumbles (0-100).
delay (Number, ms) – Delay before each rumble. Only used if
count > 1. Capped at 2500 ms.
Xbox Controller Pairing Instructions
The first time you use a controller with a hub, you will need to pair them: Turn the controller on and then press and hold the pairing button on the back of the controller for a few seconds. When you release it, the Xbox button starts flashing more rapidly. Then start your program.
When pairing and the connection is succesful, the Xbox button will stop flashing and stay on for as long as the program is running.
Repeat Connections
If you keep using the same controller with the same hub, you can simply turn the controller on the next time and the hub will connect to it automatically when your program with this class runs.
The Xbox controller only accepts this simpler connection with the most recently connected device. So if you connect to your Xbox console again, or connect to another hub, you will need to pair them again as described above.
Compatible Controllers
All Xbox controllers released since 2016 are compatible. This includes the
controller from the One S (1708 from 2016), the Elite Series 2 (1797
from 2019), and the Series X/S (1914 from 2020), which is
the latest model as of this writing.
See also this overview of model numbers including pictures of each controller.
Updating the Xbox Controller
If you frequently use the Xbox Controller with your console, your controller is probably already up to date. If you have not used it for a while or if you bought one recently, you may need to update it.
To update the controller without a console, you can use the Xbox Accessories app on a Windows computer. You can download it from the Microsoft Store. Connect the controller via USB to the computer and follow the instructions in the app to click on “Update now”.
Technic Hub Limitations
Due to limitations of the Technic Hub, the hub will disconnect from the
computer when searching for the Xbox controller. This means you will not be
able to see output from the print command. Also, you’ll have to connect to
the computer again if you want to change your program.