| ✅ | ✅ | ✅ | ✅ | ✅ | ✅ |
|---|
Color and Distance Sensor

- class ColorDistanceSensor(port)
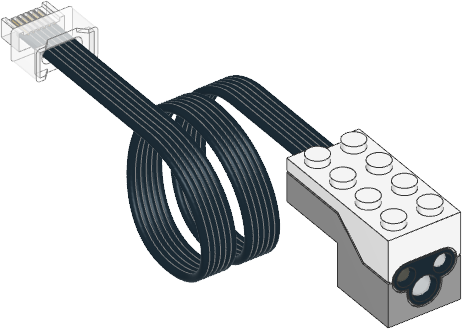
LEGO® Powered Up Color and Distance Sensor.
- Parameters:
port (Port) – Port to which the sensor is connected.
- awaitcolor() Color
Scans the color of a surface.
You choose which colors are detected using the
detectable_colors()method. By default, it detectsColor.RED,Color.YELLOW,Color.GREEN,Color.BLUE,Color.WHITE, orColor.NONE.- Returns:
Detected color.
- awaitreflection() int: %
Measures how much a surface reflects the light emitted by the sensor.
- Returns:
Measured reflection, ranging from 0% (no reflection) to 100% (high reflection).
- awaitambient() int: %
Measures the ambient light intensity.
- Returns:
Ambient light intensity, ranging from 0% (dark) to 100% (bright).
- awaitdistance() int: %
Measures the relative distance between the sensor and an object using infrared light.
- Returns:
Distance ranging from 0% (closest) to 100% (farthest).
- awaithsv() Color
Scans the color of a surface.
This method is similar to
color(), but it gives the full range of hue, saturation and brightness values, instead of rounding it to the nearest detectable color.- Returns:
Measured color. The color is described by a hue (0–359), a saturation (0–100), and a brightness value (0–100).
- detectable_colors(colors)
- detectable_colors() Collection[Color]
Configures which colors the
color()method should detect.Specify only colors that you wish to detect in your application. This way, the full-color measurements are rounded to the nearest desired color, and other colors are ignored. This improves reliability.
If you give no arguments, the currently chosen colors will be returned.
When coding with blocks, this is configured in the sensor setup block.
Built-in light
This sensor has a built-in light. You can make it red, green, blue, or turn it off. If you use the sensor to measure something afterwards, the light automatically turns back on at the default color for that sensing method.
- awaitlight.on(color)
Turns on the light at the specified color.
- Parameters:
color (Color) – Color of the light.
Examples
Measuring color
from pybricks.pupdevices import ColorDistanceSensor
from pybricks.parameters import Port
from pybricks.tools import wait

# Initialize the sensor.
sensor = ColorDistanceSensor(Port.A)

while True:
    # Read the color.
    color = sensor.color()

    # Print the measured color.
    print(color)

    # Move the sensor around and see how
    # well you can detect colors.

    # Wait so we can read the value.
    wait(100)
Waiting for a color
from pybricks.pupdevices import ColorDistanceSensor
from pybricks.parameters import Port, Color
from pybricks.tools import wait

# Initialize the sensor.
sensor = ColorDistanceSensor(Port.A)


# This is a function that waits for a desired color.
def wait_for_color(desired_color):
    # While the color is not the desired color, we keep waiting.
    while sensor.color() != desired_color:
        wait(20)


# Now we use the function we just created above.
while True:

    # Here you can make your train/vehicle go forward.

    print("Waiting for red ...")
    wait_for_color(Color.RED)

    # Here you can make your train/vehicle go backward.

    print("Waiting for blue ...")
    wait_for_color(Color.BLUE)
Measuring distance and blinking the light
from pybricks.pupdevices import ColorDistanceSensor
from pybricks.parameters import Port, Color
from pybricks.tools import wait

# Initialize the sensor.
sensor = ColorDistanceSensor(Port.A)

# Repeat forever.
while True:

    # If the sensor sees an object nearby.
    if sensor.distance() <= 40:

        # Then blink the light red/blue 5 times.
        for i in range(5):
            sensor.light.on(Color.RED)
            wait(30)
            sensor.light.on(Color.BLUE)
            wait(30)
    else:
        # If the sensor sees nothing
        # nearby, just wait briefly.
        wait(10)
Reading hue, saturation, value
from pybricks.pupdevices import ColorDistanceSensor
from pybricks.parameters import Port
from pybricks.tools import wait

# Initialize the sensor.
sensor = ColorDistanceSensor(Port.A)

while True:
    # The standard color() method always "rounds" the
    # measurement to the nearest "whole" color.
    # That's useful for most applications.

    # But you can get the original hue, saturation,
    # and value without "rounding", as follows:
    color = sensor.hsv()

    # Print the results.
    print(color)

    # Wait so we can read the value.
    wait(500)
Changing the detectable colors
By default, the sensor is configured to detect red, yellow, green, blue, white, or no color, which suits many applications.
For better results in your application, you can measure your desired colors in advance, and tell the sensor to look only for those colors. Be sure to measure them at the same distance and light conditions as in your final application. Then you’ll get very accurate results even for colors that are otherwise hard to detect.
from pybricks.pupdevices import ColorDistanceSensor
from pybricks.parameters import Port, Color
from pybricks.tools import wait

# Initialize the sensor.
sensor = ColorDistanceSensor(Port.A)

# First, decide which objects you want to detect, and measure their HSV values.
# You can do that with the hsv() method as shown in the previous example.
#
# Use your measurements to override the default colors, or add new colors:
Color.GREEN = Color(h=132, s=94, v=26)
Color.MAGENTA = Color(h=348, s=96, v=40)
Color.BROWN = Color(h=17, s=78, v=15)
Color.RED = Color(h=359, s=97, v=39)

# Put your colors in a list or tuple.
my_colors = (Color.GREEN, Color.MAGENTA, Color.BROWN, Color.RED, Color.NONE)

# Save your colors.
sensor.detectable_colors(my_colors)

# color() works as usual, but now it returns one of your specified colors.
while True:
    color = sensor.color()

    # Print the color.
    print(color)

    # Check which one it is.
    if color == Color.MAGENTA:
        print("It works!")

    # Wait so we can read it.
    wait(100)